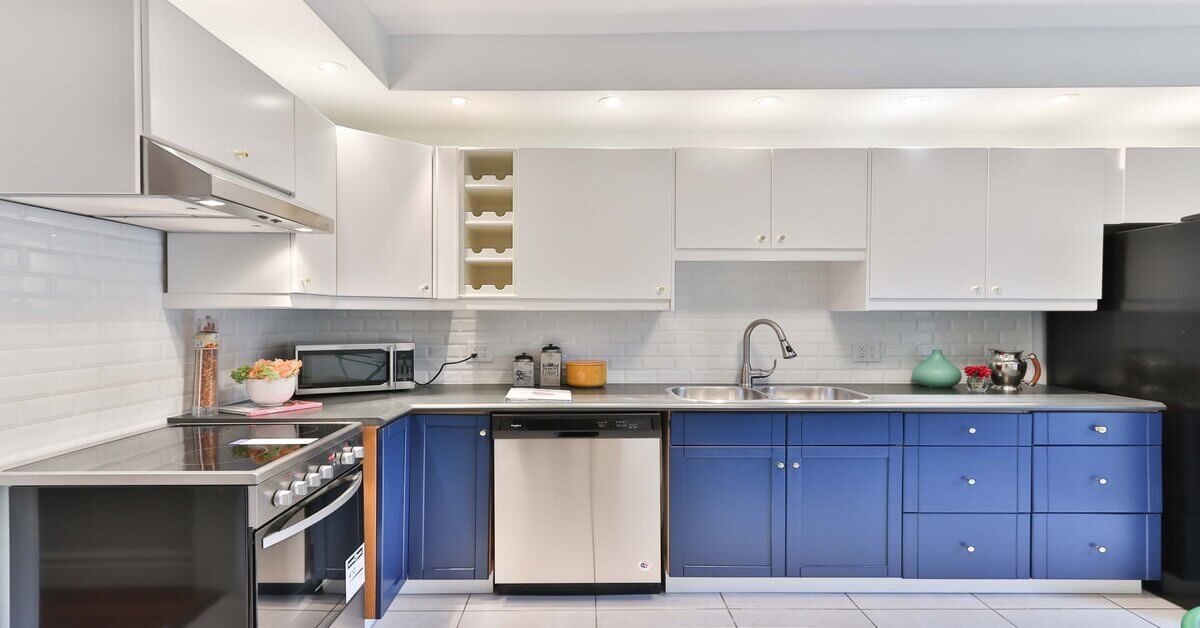
Cleaning Schedule For Tenants

While the responsibility for maintaining the functionality of the rental unit falls on the property manager or the landlord, maintaining the cleanliness inside is the responsibility of the tenant. Keeping to a regular cleaning schedule can help you maintain your home and potentially keep more of your security deposit if you plan to move out. To keep a regular schedule, you can break down cleaning tasks into daily, weekly, monthly, and annually. Here is a useful cleaning schedule: 

Daily

Wipe down surfaces

Every surface can collect dirt and dust. Give a quick wipe down of the surfaces around your home every day, especially those you use frequently like countertops and tables. This will help keep the rest of your home from collecting dust while also increasing the longevity of your furniture and floors. 
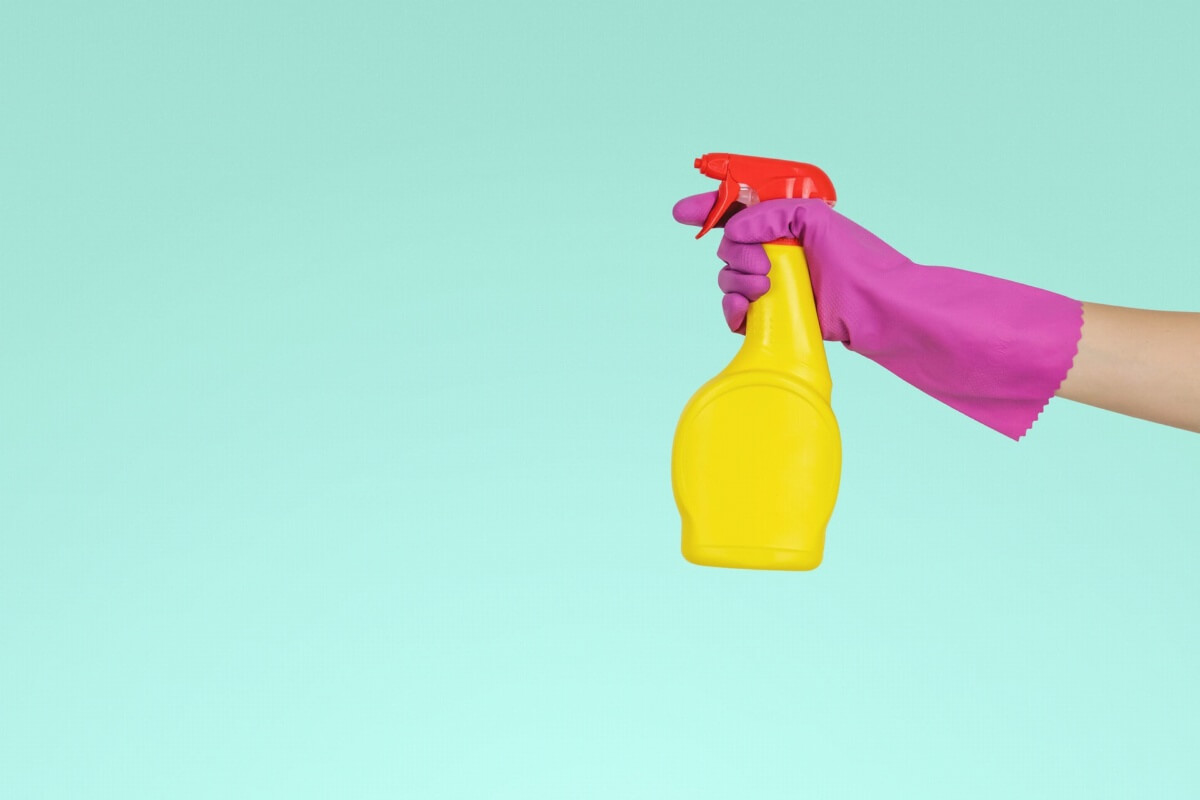
Clean the sink

Using dish soap or a cleaning spray, clean the sink every single day. This will help prevent bacteria from building up while also making the sink last longer.

Vacuum and sweep

Sweeping and vacuuming daily will prevent any dirt build up on your carpets and floors, especially in difficult-to-reach places like under your couch. Preventing the dirt build-up on your floors helps maintain the quality of your carpet and floors. 

Weekly

Clean sink and countertops

While you should wipe these down daily, once a week you should give a deeper scrubbing to these parts of the home. Make sure you get in all the cracks and crevices to keep any mold or grime from building up. 

Clean the microwave

With a sponge and soap, wipe down the inside of the microwave to prevent build-up which would make it a much more difficult task down the road. 

Mop the floors

After you do your daily sweeping, be sure to mop the floors at least once a week. This will prevent any built of dirt and grime that will be much more difficult to clean up later on. 

Scrub the toilet

Scrub the toilet at least once a week to prevent any buildup from hard water and human waste. This will help keep your toilet bowl looking sparkling clean and prevent any stains. 

Clean your fridge

Go through the contents of your refrigerator and remove anything that has gone bad. Be sure to wipe down the surfaces especially if there have been any leaks or spills. This will help prevent any bad odors from building up and a need for a deep cleaning later on. 

Monthly 

Dust above your head

Clean any dust and cobwebs from ceiling lights, high shelves, and fans. This will help prevent dust from building up in the rest of the house. 

Dust and clean your vents

Cleaning vents is an important safety measure as it can reduce the risk of fire in your home. It’ll also keep dust from spreading throughout your house when the heating or AC is on. 

Clean walls and baseboards

Walls can collect a lot of dust, dirt, and grime, especially the baseboard. Giving a monthly wipe-down will keep the paint in good condition and keep your home looking clean and presentable. Use this time to remove any cobwebs that may have built up in the upper corners of each room. 

Clean windows and blinds

Clean both the interior and if you can the exterior of your windows. They can collect a lot of dirt and dust over the course of a month. It is the same with your blinds. Waiting too long to clean your blinds can leave them stained and difficult to clean. 

Scrub the grout

Cleaning the grout regularly will help prevent mold build-up which would create more serious damage. If the grout is looking gray or black, it is in need of a cleaning. 

Clean garbage disposal

Use a garbage disposal cleaner once a month. This will help the upkeep of the garbage disposal while also keeping your sink from spreading bad odors throughout the house. 

Annual

Clean behind appliances

This may require some help from a friend, family, or roommates. If you don’t have anyone to help move the larger appliances, you might want to hire someone for deep cleaning. Pull the appliances away from the wall to give you enough space to clean and remove all the dust build-up. After the dust has been removed, mop the floor area and wipe down the walls. 

Deep clean carpets and upholstery 

If you need to, you can rent a carpet cleaner to clean both the carpets and upholstery. Another option is to hire a carpet cleaner. The best time of the year to do this is after the rainy season has ended in the spring or possibly the summer depending on the climate you’re in. 

Deep clean oven

This is important in preventing any grease build-up which can be a dangerous fire hazard. 

Wipe down shelves and cabinets

Since this is where you store your dishes and food, you’ll want to make sure there isn’t a lot of dust and dirt build-up.  

How To Replace An Electrical Outlet

There are a number of ways to reduce costs when it comes to maintaining your rental property. One way to do this is to make a list of small repairs around the house that can be learned and done on your own. This will help by reducing labor costs for minor repairs. One simple repair that can be learned easily and done on your own is to replace the electrical outlets. 

This is a simple and inexpensive replacement that can improve the look and functionality of your rental unit. Replacing old outlets will also improve the safety of your rental unit as well. Here is how to replace your electrical outlets: 

Step 1: Turn off the power

Cut the power to the outlet on the breaker panel. If you are unsure of which breaker is connected to the outlets you’re replacing, just cut the power to the entire house to be safe. 

Step 2: Remove the faceplate

With a screwdriver, remove the screws to the faceplate and take remove the faceplate entirely. Be careful when removing as the faceplate may be stuck to the paint. 

Step 3: Remove the outlet

Using a screwdriver, remove the screws connecting the outlet to the box. Once you have the screws removed, carefully pull the outlet out of the box. It’ll be connected to the electrical wires, so don’t pull too hard. 

Step 4: Detach wires

Loosen the screws on the outlet where the wires are attached to it. Once they are loose, remove the two electrical wires and the grounding wire from the outlet. 

Step 5: Attach the grounding wire

Loop the grounding wire around the screw in the box leaving enough length to connect the grounding wire to the outlet as well. The grounding wire will either be green or a bare copper wire. 

Step 6: Attach the outlet

Next up, you’ll need to attach the electrical wires and the grounding wire to the new outlet. You’ll know where to connect the wires based on the color of the screw and the color of the wires. Loosen the screws and wrap the wires around the corresponding screws, and tighten them. The black wire connects to the brass screw. The white wire connects to the silver screw, and the grounding wire connects to the green screw. 

Step 7: Insert outlet into the box

Gently insert the outlet into the box. Once the outlet is where you want it, use a screwdriver to secure it in place. Don’t tighten it too much. Instead, tighten it just enough so it doesn’t move. 

Step 8: Attach the faceplate

Using the screws and a screwdriver, attach the faceplate to the outlet. Make sure you tighten the screws only enough to secure the faceplate. If you screw them in too tight, you can crack the faceplate or run the risk of it cracking from being bumped later on. 

Step 9: Turn the power on

Head to your breaker panel and turn all the power back on. You can test the outlet with a phone charger to make sure everything is working properly. If you opted to install a smart outlet, you can also now take the necessary steps to set it up. 

Consider using Autopilot, a property management software that helps landlords streamline maintenance by offering repair management as part of its services.

Proposed Bill To Change Eviction Laws In California

A law that would change the rules for evicting tenants in California has been proposed in the assembly. AB 854 is a new piece of legislation aimed at protecting tenants from serial evictors. The big change in the law if the legislation passes would require landlords to own a property for five years before they can use the Ellis Act to evict a tenant. 

Changes to target serial evictors

The Ellis Act is a California law that allows landlords to evict tenants if they are taking the rental units off the market. A loophole that is regularly used is to convert apartments into condominiums. The proposed law would limit the ability of landlords to purchase an investment property and use loopholes to evict the tenants by requiring the landlords to wait at least five years before using the Ellis Act. 

The legislation still needs to move through all the necessary committees, then be approved by both the State Senate and the Assembly and signed by Governor Newsom before it becomes law. If it does pass, it likely will not impact mom-and-pop landlords who own and rent properties and aren’t regularly acquiring new investment properties. 

The legislation could see potential changes as it makes its way through each committee, but as of now, the major change would be requiring landlords to own a property for five years before using the Ellis Act. This should not impact the average landlord when it comes to managing properties, but it could have an impact when it comes to selling an investment property to other investors. 

DIY For Tenants: Setting Up Your TV Room

When moving into a rental property, you can be in a rush to just get settled and not take too much thought into positioning your TV and couch properly. When setting up your living room, you’ll want to make sure you get the TV and the couch set up with all the correct distances. This will include both the height of the TV and the distance to place the couch from the TV. 

Height

Generally, you will want to place the TV at around eye level. This means eye level when sitting down on your couch, not standing. This will be easier if you have a second person who can sit down on the couch and tell where to mark along the wall for installation. This can also be dependent on the tilt of the wall mount and personal preference, but the general rule of thumb is to keep the TV at eye level. 

Distance

The rule of thumb when it comes to the distance between the couch and the TV is to keep the distance of the couch to  1.5 to 2.5 times the size of the TV. This means if you have a 55” TV, you’ll want the couch to be between around 7 feet to around 12 feet away from the TV. 

Screen SizeRecommended Range
26″3.25′ – 5.5′ (1.0 m – 1.7 m)
32″4.0′ – 6.66′ (1.2 m – 2.0 m)
37″4.63′ – 7.71′ (1.4 m – 2.4 m)
40″5.0′ – 8.33′ (1.5 m – 2.5 m)
42″5.25′ – 8.75′ (1.6 m – 2.7 m)
46″5.75′ – 9.5′ (1.7 m – 2.9 m)
50″6.25′ – 10.5′ (1.9 m – 3.2 m)
52″6.5′ – 10.8′ (2.0 m – 3.3 m)
55″6.9′ – 11.5′ (2.1 m – 3.5 m)
58″7.25′ – 12.0′ (2.2 m – 3.7 m)
65″8.13′ – 13.5′ (2.5 m – 4.1 m)
70″8.75′ – 14.75′ (2.7 m – 4.5 m)

TV manufacturers will give their own recommendations that may be different. These are just guidelines to start from and what you choose to do can be based on manufacturer recommendations or just your own personal preference. 

The size of your room should also impact the size of TV you purchase. If you have limited space, you probably shouldn’t be buying a 75” inch TV. This could give the feel of sitting in the front row of a movie theater. 

You’ll want the viewing angle of the TV from the couch to be about 30 degrees. This means the seating area shouldn’t be too wide so the viewing angle is more from the side of the TV instead of directly in front of it.

Proper Record Keeping For Landlords

While much of the focus for landlords can be on the big picture stuff, like how much to charge for rent, or what renovations should be made, the importance of maintaining proper records can fall by the wayside. This can especially be the case if being a landlord isn’t your primary job. So what are some of the best practices for maintaining your paperwork and making sure the little things aren’t falling through the cracks?

Digital or physical

Some landlords are old-school and prefer to keep all their records and paperwork filed away in drawers in an office. Others have looked for more modern solutions through computers with spreadsheets and PDFs as well as specific software for managing properties. Both have advantages and disadvantages. Physical records can be available to you regardless if your computer is working or your internet is down. Digital records will give you access to everything no matter where you are as well as make them easier to find. 

Find what works best for you. Develop a system, and be sure to maintain that system. If you’re uncomfortable with computers and keeping digital records, you can start by transitioning everything to digital while still maintaining the physical records as a backup. Once you’re comfortable with digital record keeping, you can dispense of all the physical records. 

Tax records

The IRS and local governments require you to keep certain records for specified periods of time even after they are no longer needed for your day-to-day work. When creating a record-keeping system, make sure you keep track of which records you need to keep and for how long. This will include detailed reports of your revenue, your profits, and your losses. If you have any questions about which records need to be kept and for how long, consult a tax attorney or an accountant. 

Tenant records

Keep files on every tenant. Keep leases on file as well as any paperwork regarding walkthroughs during moving in and out. Also, keep track of any repairs during their time as a tenant. Keep detailed paperwork of expenses as well as their security deposit. This can save you if a former tenant wants to dispute any charges paid by the security deposit. 

Property Management

To help keep track of all your records, sign up with Ziprent. Ziprent will help maintain all your records as well as generate useful reports to help manage your business and the day-to-day operations of your properties. 

Know when to let go of your records

You don’t want to be a hoarder so make sure you know when paperwork is passed the IRS’s recommendations for record-keeping and dispose of the paperwork properly. If you keep physical copies of your paperwork, make sure you get a proper paper shredder which will make it impossible to put the records back together once they are shredded and tossed in the garbage. 

How To Lower Landscaping Costs On Rental Property

When it comes to cutting costs on rental property maintenance, one area that can often be overlooked is landscaping. There are multiple ways to go about cutting costs. It could be more about sustainability or properly maintaining the landscaping you already have. Here are a few ways to cut costs: 

Water overnight

Since it takes about a half-gallon of water per square foot of grass to properly water a lawn, it is best to water overnight.  Watering overnight will prevent water from evaporating, meaning it will require less water and save money over time. This also has the added benefit of reducing potential damage to grass and other plants since water can act as a magnifying glass under a hot sun. 

Use the 3-inch rule for grass

While having short grass may be more visually appealing, it can make maintaining a lawn much more expensive as it is more likely to damage the lawn while also requiring more regular mowing. Keeping the grass at least 3 inches in length will give it more surface area to catch more sunlight and help with photosynthesis creating a healthier lawn. This helps the lawn develop a strong root system that will prevent weed growth. This also helps cut costs when it comes to weed removal. 

Xeriscape 

This is a fundamentally different way of looking at landscaping. It is more of a long-term strategy that may require a lot of change when it comes to the plants that are currently in the yard. Xeriscaping is about using indigenous plants that evolved to succeed in the local climate. This means they would require less watering while having the added bonus of being able to sustain droughts where other plants would likely fail. You can research your climate and find out what pants naturally occur and landscape your property based on those plants. 

Talk to your landscapers

Some landscapers may take a one size fits all approach to dealing with weeds. This may be less effective on some weeds causing them to come back. If they aren’t using proper techniques, you can ask them to look into it, or you can look for a new landscaper who is more knowledgeable when it comes to yard maintenance. 

Plant perennials 

By planting perennials, you won’t have to worry about planting new plants every year. They will bloom around the same time every year and create more curb appeal for your rental property. This can help when it comes to tenant placement and finding the right tenants while also lowering the regular maintenance needed for the yard. 

Mulch

Talk to your landscaper about leaving the trimmings from mowing the lawn on the grass. This can help provide much-needed nutrients for your grass while also reducing the amount of waste that needs to go into the trash.

DIY: How To Refinish Interior Doors

When managing rental properties, costs can add up quickly. Routine maintenance doesn’t require just the tools and supplies to complete the job, it can also require the cost to hire labor in order to complete the tasks. One way to reduce costs is to select some tasks that can be done on your own in a timely manner. One task that can be done on your own is to refinish and maintain all the interior doors in your rental property. Here is how you do it: 

What You Need

  • Gel stripper
  • Brushes
  • Scraper
  • Steel wool
  • Mineral spirits
  • Rag
  • Random orbital sander
  • Sandpaper
  • Tackcloth
  • Stain
  • Clear finish
  • Sawhorses

Step 1: Remove the door from the hinge

Using a screwdriver, drive the pin in the hinge from the bottom up. Start with the lowest hinge and work your way up until you can remove the door completely. 

Step 2: Apply stripping gel

After removing the door from the hinges, rest it on a pair of sawhorses. With a brush, spread a gel-type stain over the surface of the door. Read the instructions for the gel and allow it to sit for the recommended amount of time. Once the required time has passed scrape the old finish from the surface of the door. Use fine steel wool to remove the finish from any remaining parts of the door. Soak a rag in fine mineral spirits and rinse the door. Let it dry before the next step. 

Step 3: Sand the door

Using a random orbital sander, sand the surface on the first pass with 100 grit sandpaper. To complete the process, use 220 grit sandpaper on the final pass before using the door stain. Wipe down all of the dust on the door with a  tackcloth, then flip the door over and repeat the same process on the other side. 

Step 4: Stain the door

Choose the color of stain for your door. Using a soft bristle brush, apply the stain to the surface of the door. Brush as evenly as possible in order to avoid runs and drips. Once you are done, allow for the stain to dry before moving on to the next step. 

Step 5: Lightly sand door surface

With 220-grit sandpaper, sand the door lightly and wipe off any dust with a tackcloth. Then flip the door over and repeat the process on the other side, wiping it down with a tackcloth when done. 

Step 6: Apply clear finish

Using a soft-bristle brush, apply three coats of clear finish. Follow the instructions for the proper drying team in between applying each coat. Using  0000 steel wool, polish the door between the first and second coats. After using the steel wool, polish with a tackcloth. Allow for the door to dry completely before turning over and repeating the same process on the other side. 

Step 7: Hang the door

Let the door sit overnight to allow it to dry thoroughly. Line the door up with the hinges and with a hammer, drive the pin down from the top. Start with the top hinge first and work your way down. 

With all the work that goes into managing a property, it can be difficult to keep track of all your costs as well as your income. Ziprent & Autopilot can help keep track of all of your expenses and revenue with comprehensive reports that are easily accessible on your dashboard. They are easy to use and can help both small and large landlords manage each property efficiently.

How To Access Your Profit And Loss Statement

How to access your “Profit and Loss Statement

Ziprent keeps a number of reports for each of your properties to make sure some of the most valuable data is all in one place. This information will assist in your ability to make smart and informed decisions based on each individual property you own. Keeping track of both your expenses and your income will help you figure out where you can cut costs as well as ways to increase income. If you have any questions about the reports, you can contact Ziprent. If you want to access your “Profit and Loss Statement” just follow these simple steps:

Step 1:

Log into your Ziprent account.

Step 2:

In the top right corner, you will see your username. Click on your username.

Step 3:

After clicking on your username, drag your mouse down and click on the “Reports” button. This will give you access to all of the reports Ziprent keeps for your properties.

Step 4: 

On the left side of the “Reports” page, you’ll see a dropdown box that will allow you to select any report you wish to see. Click on that dropdown box.

Step 5: 

After clicking on the dropdown box, drag your mouse and select “Profit and Loss Statement”

Step 6:

Under the dropdown box is a box where you can select which property of yours you would like to see the “Profit and Loss Statement” for. Select a property.

Step 7: 

Select the dates for the time period you would like the report to show. For example, if you want to see your report from 2020, you would select 1/1/2020 to 12/31/2020.

Step 8: 

Now you have your “Profit and Loss Statement.” You will be able to see your net income as well as your total expenses for your property. You can also download your report in the form of a PDF or a CSV, whichever you prefer.

How To Refinish Kitchen Cabinets

Regular maintenance and repairs, especially when preparing a unit for a new tenant can get expensive. With a high turnover of tenants or the more units owned, those costs can add up quickly. One way to keep costs down is to do some of that routine maintenance yourself. 

New kitchen cabinets can cost over 5,000 dollars while refinishing and painting them yourself can cost only hundreds. You could pay workers to do the job for you, but that will increase the costs just to touch them up. Painting the cabinets yourself can be done in a weekend if you know what you’re doing.

Before starting

Examine the cabinets to make sure they don’t have any structural damage. As long as they are in good condition, you won’t need to replace the cabinets. There is also a good chance the older cabinets are made with a higher quality of material than any newer reasonably priced cabinets. 

Both oil and latex paints can be used. Latex paints tend to take longer to cure but they are more user-friendly for those who aren’t experienced. If you do choose latex paint, make sure it is a 100 percent acrylic formulation.

Brush and spray paint are both options. Spray painting may require you to pick up some extra equipment depending on what you already have. It will require a space that won’t risk paint getting everywhere and will also require a mask and this could end up being more time-consuming.

Be sure to use high-quality brushes. Purchase a 3 to 4-inch wide square brush as well as an angled 2 and a half to 3-inch wide brush. Use a synthetic bristle brush for latex paint and a natural bristle brush for oil-based paint.

If the existing finish is a clear coat, it’s a good idea to strip it down to the bare wood before painting. This will eliminate a potential adhesion problem with the new paint.

Step 1: Prep the kitchen

  • Empty all the cabinets. Clear all the counters and remove all the free-standing appliances
  • Move all tables and furniture out of the room 
  • Tape rosin paper over the counter and the floor. Use plastic sheeting on the backsplash and any windows and doors. 
  • Mask off the walls around the cabinets
  • Set up a worktable for painting the drawers, doors, and shelves.

Step 2:  Remove the shelves, drawers, and doors

  • Remove the hinge screws from the cabinet and remove the doors
  • Working from left to rights and top to bottom, number each piece with tape and number where they came from with the same number. 
  • Set aside shelf hanging hardware
  • At the worktable remove any screws and hinges. Be sure to save anything that will be reused. 
  • Move the numbered tape to the exposed wood where the hinges were 

Step 3: Clean the surfaces

  • Use ordinary household cleaners to remove the grime from all of the surfaces you intend to paint. If ordinary cleaners don’t do the job, you can use trisodium phosphate, which is sold at hardware and paint stores. Make sure you follow all safety precautions.
  • Once all the surfaces are clean, rinse them with water and let them dry completely

Step 4: Prep boxes

  • Put on required safety gear. Open any windows in the room for ventilation. Dip the abrasive pad in deglosser and scrub down all the surfaces
  • Hold a rag underneath to catch any drippings. Use a separate rag dampened with deglosser to wipe away any residue.
  • If you’re relocating any of the hardware, fill the screw holes with a two-part wood or autobody filler
  • Fillers set in about 5 minutes so only make small batches. It also shrinks when it sets so be sure to overfill the holes
  • Remove any excess with a paint scraper or if it becomes too hard, sands it down smooth.
  • Sand with the grain on all surfaces using 100 grit sandpaper 
  • Vacuum all the dust when you’re done. Also, wipe down with a tack cloth to make sure there is no more dust

Step 5: Prime cabinet boxes

  • Use a blocking primer on any heavily stained cabinets. It dries quickly and seals any knots and other surface defects that could possibly bleed through 
  • Start brushing the primer at the top and across the grain, then tip-off. Pass the brush lightly over the wet finish in the direction of the grain then tip-off. Always do this in one pass 
  • Be sure to follow the underlying structure of the cabinet and door with the brush. Where a rail butts into a stile, paint the rail first, overlapping slightly onto the stile, then paint the stile before the overlap dries.

Step 6: Sand, Caulk, and Fill

  • When the primer is fully dry, use 220 grit sandpaper on the flat surfaces
  • Using a medium grit sanding sponge, sand all profiled surfaces. They should be glassy smooth when done. 
  • Squeeze a bead of latex caulk into any open seems. Caulk tip should be no thicker than the tip of a pencil. 
  • With a damp finger, smooth the caulk. Fill any small dents, scratches, or dings with vinyl spackle. Smooth with a flat with a putty knife
  • After about an hour when the spackle is dry, sand with 220 grit sandpaper. Then vacuum and wipe down with a tack cloth 
  • Touch up any spots where sandpaper might have burned through the primer with a spray can of fast-drying oil-based primer.

Step 7: Paint the cabinet boxes

  • If the new color is the same shade as the existing color, you might be able to get away with using just two or possibly one coat of paint.  Using a lighter finish over a dark coat would take three coats. Be sure to use a new brush with each coat. 
  • Starting from top to bottom, brush across the grain, then tip-off with the grain. 
  • Use a mini paint roller for the interior of the cabinet 
  • Sand the surface between each coat and make sure to remove any dust or debris. 

Step 8: Prep, prime, and paint the doors, drawers, and shelves

  • Be sure to use the worktable to reduce the risk of any drips, sags. or runs. 
  • For paneled doors, start with the area around the panel.
  • Next, do the main field panel, followed by the stiles and rails around the edges
  • Wipe up any paint that ends up on the dry parts to avoid lap marks
  • When you’re done painting, pick up the door by the screw and one hook and hang both hooks on a sturdy clothes hanger. 
  • Hang from a curtain rod or clothes rod until dry

Step 9: Put everything back in place

  • Make sure everything is dry before the next step
  • Match the numbered tape on each piece and remove the tape before installing. Install all the hinges and knobs. 
  • Replace the drawer pulls and install each drawer. 
  • You’re done!

New California Housing Laws

Over the years, California has created a labyrinth of regulations, fees, barriers for housing construction which has contributed to the housing shortage. Identifying these laws and regulations as one of the main drivers, the state legislature in recent years has passed laws to remove the restraints. Some of the laws deal with land use and how many units are allowed on each parcel, others are related to cities imposing fees and requirements that make increasing the number of units impossible. Here are a few of the new laws that can impact the decisions of landlords and homeowners who want to grow their businesses and increase the value of their investment properties.

SB 9

A large percentage of land in California is zoned for residential use is zoned for single-family homes, restricting construction to one home per lot. SB 9 changes that for most single-family lots throughout California. It allows for the construction of a duplex on each lot, or the lot can be split into two, allowing for the construction of up to two duplexes (4 units total). Each unit can be sold or rented individually. Accessory dwelling units are not allowed on lots with duplexes.

There are a few restrictions for single-family lots to qualify. In order for the lot to be split into two, it must be at least 2,400 square feet. Historical homes and historical districts are exempt from the law. Homes in areas deemed high-risk fire territory are exempt as well.

There are also some restrictions in regards to renting and building duplexes. The owner must sign an affidavit stating their intent to make the home their primary residence for three years. Short-term rentals are also not allowed. All units have a one-month minimum requirement for leases. This means using the property initially for an Airbnb rental isn’t an option. Owners or any business connected with an owner of a parcel that has been split into two cannot do the same to an adjacent lot.

SB 10

One of the barriers to constructing higher-density housing like small apartment complexes is the frivolous lawsuits that come with construction and zoning changes. SB 10 helps to expedite the process. It helps cities rezone lots for up to ten units in high-transit areas and urban infill. Keeping local groups from filing lawsuits that can be drawn out for over a decade can help to keep costs down making the construction of small apartment complexes more economically viable. Cities are required by state law to change zoning to meet housing construction requirements which mean more lots will be zoned for this kind of construction in the future.

AB 68

Accessory dwelling units or granny flats are now allowed on single-family lots throughout California. AB 68 allows for the construction of an ADU and/or junior ADU up to 500 square feet to be constructed on a single-family lot. The junior ADU must be built within the original framework of the house. Some cities implemented delays and fees effectively making the construction of ADUs impossible. AB 68 removes those barriers.

The bill reduces the maximum time for approval from 120 days to 60 days. It also eliminates barriers for construction like minimum lot size and floor area ratios which made construction effectively impossible. The requirement for 1:1 parking replacements if the garage is turned into an ADU is also eliminated. It includes a by-right approval for all ADUs and junior ADUs for a minimal process. Cities are now also prohibited from banning short-term rentals in ministerially approved ADUs. The state can also investigate and compel cities to follow new ADU laws.

SB 8

This bill extends the Housing Crisis Act of 2019 to 2030 (the original date was 2025). Under this legislation, housing can’t be demolished in order to downzone or reduce the number of units. A lot with more than one unit cannot be demolished in order to have one house built on it. “Protected” units that fall under rent control or affordable housing or housing occupied by low-income residents must be replaced. Furthermore, any residents living in these units must be provided assistance for relocation.

In order to speed the process up for constructing new housing, cities are required to implement a preliminary application process. This is meant to lock in all the requirements and fees beforehand to allow for certainty for applicants. Under the legislation, there is also a maximum of 5 hearings before approval. The project must be approved or denied by the 5th hearing.

A city is required to respond within 30 days of the submission of a housing project proposal to determine in writing if it meets all the standards. If it does not, they are required to provide a list of changes that need to be made in order for the project to be approved. In any subsequent review of the project, the city cannot require any new information that was not included on their list.

The time required for project approval after an environmental impact report is certified has been reduced from 120 days to 90 days. For projects seeking tax credits or other public funding (like affordable housing) time for approval is reduced to 60 days. The law also requires cities to approve all projects that comply with the general plan or zoning ordinances.